Heating properly from the start: your first wood stove
Your first wood stove? Our explainer film (in German) shows step by step which wood belongs in the stove, how to store it, how to light it from above or from below and add wood properly, what is normal during the first fires and what the "Ofenführerschein" stove licence is all about. With chapters to jump to directly and an interactive version.
You have your first wood stove and are looking forward to the first fire? Our explainer film shows you step by step what matters, from the right wood and lighting the fire to the first evenings with your new stove. Above the film you can switch to the interactive version and go through everything at your own pace.
The film is in German with German subtitles. Below you will find the most important points in English.
Wood does not burn, it gasifies
When wood gets hot, the water still inside it evaporates first. Only then does the heat break down the wood, producing combustible gases. Specialists call this process pyrolysis. What you see as flames are exactly these wood gases burning with the air. At the end the charcoal is left over and slowly glows out as embers.
This gives three rules for every good fire: the wood must be dry, the gases need enough air, and the firebox must get hot enough. If one of these is missing, the gases escape unburnt as smoke and soot.
The right wood
Only untreated logs belong in your stove. Painted or treated wood, chipboard, cardboard and waste have no place in it.
- Well seasoned: Softwood such as spruce or birch needs at least one year, hardwood such as beech or ash at least two years, until the residual moisture is below 20 percent.
- Measuring the moisture: Split a log and use a wood moisture meter in the middle of the freshly split surface, because the outside of the wood is often drier than the inside.
- Handy logs: Smaller wood has more surface area, gives off gas more evenly and brings the stove up to temperature faster. Your operating manual states how long the logs may be.
- Split round wood: Bark holds moisture in the wood, and the fire catches much more easily on the light split surface. A piece of bark on a log is permitted, but less is better, because bark contains many times more ash.
- Not too much at once: In a trial commissioned by the German Environment Agency, all participants added too much wood. As a result the stove got much hotter than intended, and the dust in the flue gas rose sharply. The manual also states how much wood belongs in your stove.
Storing wood properly
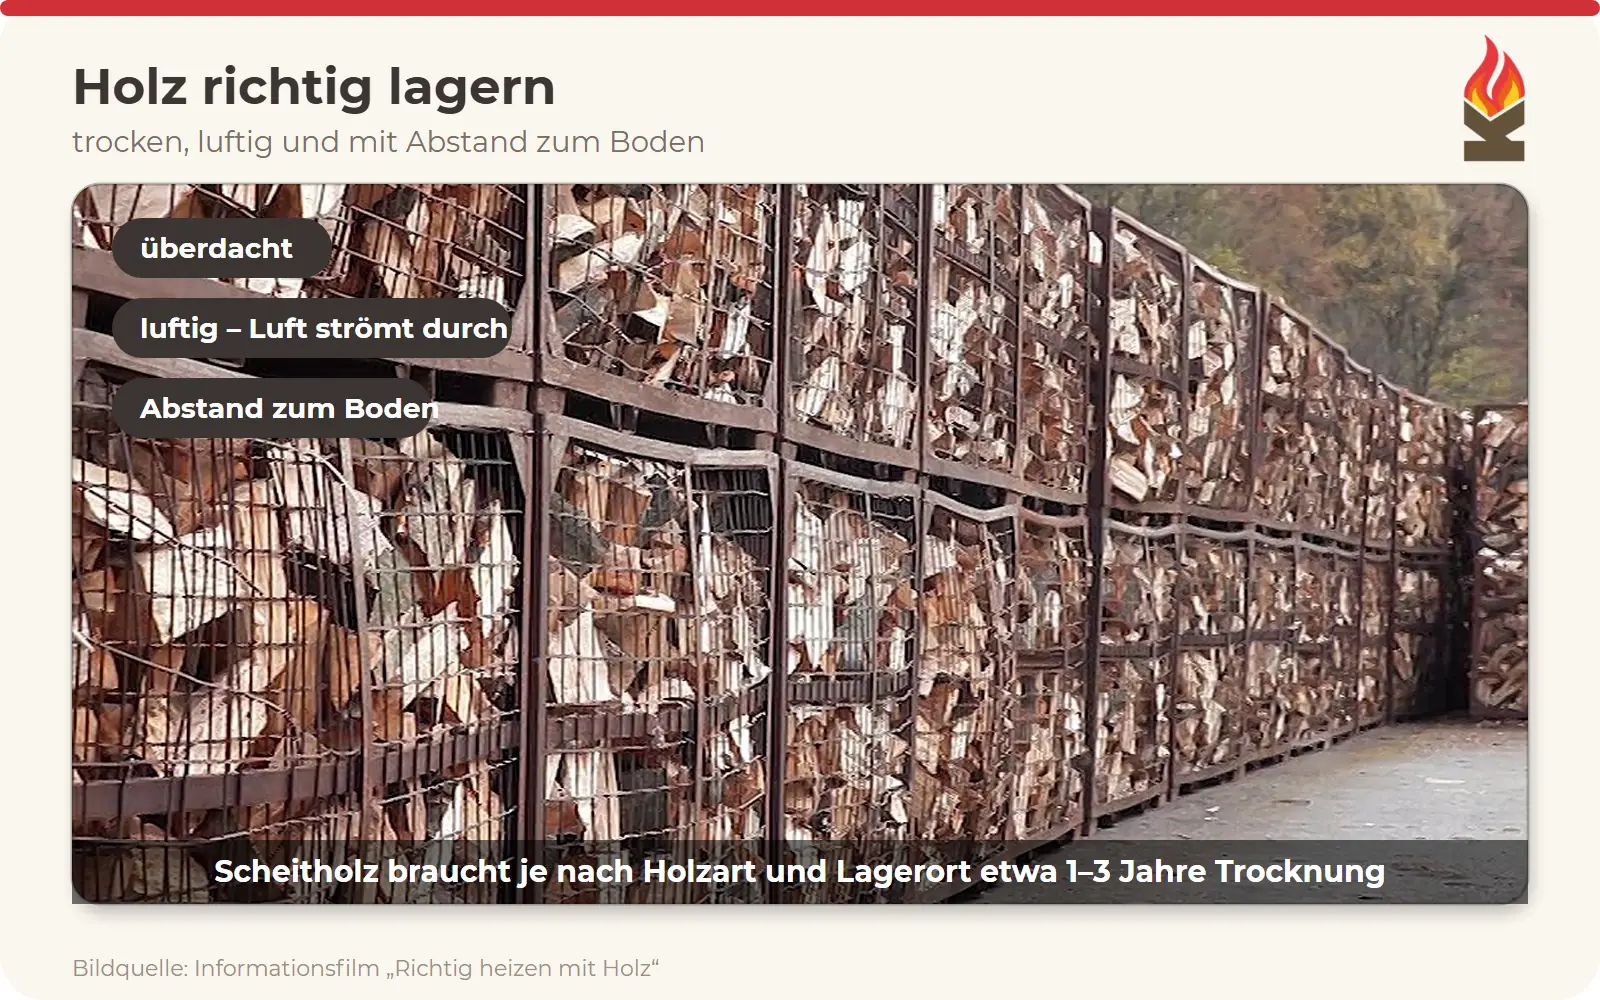
Fresh wood dries best outdoors. Store it under a roof to keep off the rain, raised off the ground, for example on pallets, and in an airy spot where the wind can pass through the stack. Do not cover the stack with a tarpaulin down to the ground, and do not store fresh wood in a closed garage or in the cellar. Without air exchange it does not dry but starts to go mouldy. There is more on this in our guide Storing firewood (in German).
Bring the amount for the evening into the house one to two days beforehand. That way the wood reaches room temperature and the moisture on its surface can dry off. But do not put the log basket right next to the stove. The rating plate of your stove states the distance required from combustible objects.
Lighting from above or from below
Before lighting, open the air controls fully; there is usually a "lighting" setting for this. The flue pipe itself always stays open.
- From above: Two to three split logs lie side by side in the firebox with a little space between them, split edge facing up. On top goes some smaller split wood laid crosswise, and on top of that a small pyramid of finger-thick kindling with a wood wool firelighter. The fire burns from top to bottom, much like a candle, and the gases from the wood below rise through the flames and burn there. This produces considerably less smoke and dust, and you do not need to add wood at the start. On the other hand, it takes a little longer to build, and you need enough dry kindling.
- From below: The firelighter lies right at the bottom, with two layers of kindling on it and two to three thinner logs on top. This is how many people learned it years ago. The fire is built quickly and catches fast. However, the gases from the upper logs first rise through wood that is still cold and partly escape unburnt, so there is more smoke in the first few minutes.
Your operating manual states which method suits your stove. Many stoves are lit from above, some stoves with a grate from below. During installation we will show you this directly on your own stove. Flammable liquids such as methylated spirits or barbecue lighter fluid are strictly off limits, because they can ignite explosively and cause serious injuries.
Burning and adding wood
As soon as all the logs are burning properly, set the air back to normal operation. You can recognise a good fire by calm, bright flames that do not reach the baffle at the top of the stove.
Add wood when the yellow flames have gone out and only embers are left. Open the door slowly, just a crack at first, so that the smoke keeps drawing upwards and does not enter the room. Push the embers together and place two to three logs gently on top, because throwing wood in can damage the lining of the firebox.
When you no longer want to heat, simply stop adding wood and let the embers burn out. Only close the air once the fire is completely out.
The first fires in your new stove
During installation we explain your new stove to you directly on the appliance. Before the first fire burns, the chimney sweep then inspects the stove.
- The paint hardens: During the first firing there may be a smell and also a little smoke. This is completely normal. Ventilate well, and after a few fires it is over.
- Start gently: Use less wood for the first two or three firings so that the material gets used to the heat slowly. Do not touch the surface during this time, because the paint is not yet fully hard.
- Black firebox: If the light lining turns dark or even black after a cool start or with slightly damp wood, that is soot and not damage. In that case, have one proper fire with dry wood and enough air. From about 400 degrees the soot burns off by itself, much like in an oven with pyrolytic cleaning.
- Cracks in the bricks: Over time the bricks in the firebox often develop fine cracks. As long as they are only cracks, there is no cause for concern. Only when pieces crumble out should the bricks be replaced, ideally in summer rather than in the middle of the heating season.
If the glass turns grey as well, our film Die Scheibe wieder klar (in German) shows you how to get it clean.
The "Ofenführerschein" stove licence
If you want to know exactly how it works, you can take the "Ofenführerschein", a kind of stove licence. It is a voluntary online course from the Ofenakademie (in German); the idea comes from a research project of the German Environment Agency. The course takes about two hours, consists of short learning videos and ends with a test and a personal certificate. Some towns and districts give away access, so it is best to ask your local authority.
A test-bench trial with six participants shows that this knowledge pays off: after training they lit the fire according to the instructions and added the right amount of wood, and the dust when adding wood fell by around four fifths.
What a good fire needs
Dry wood, the right amount, enough air and a hot firebox: a good fire needs nothing more. If you have any questions, call us on +49 5374 66092, write to us using the contact form or visit our showroom in Ausbüttel.